Quantcast
Channel: Skip To My Lou
Viewing all 1107 articles
Browse latest View live

Heart Garland

$
0
0

I love hanging decorations from my ceilings.

 heart-1.jpg

I took a few different colors of cardstock (construction paper works too) and cut out different heart shapes. I did have access to a die-cut machine but don’t let that stop you if you don’t!  Hand cut hearts would probably me much more charming!

hearts-2.jpg

I sewed through them on my sewing machine with clear thread. Pull out a foot or so of thread before you start sewing so you have plenty to hang your hearts with.

heart-3.jpg

I could never have too many of these hanging around!

heart-4.jpg

The post Heart Garland appeared first on Skip To My Lou.


Valentine’s Day Ideas, Crafts, Decorations and Activities

$
0
0

I am ready to post some new Valentine’s Day Ideas in the next few weeks, but first here are some ideas from the past.

Valentine Decorations

Stain Glass Hearts

Conversation Heart Garland

Hanging Hearts

Valentine Doormat

Free Printable Valentines

Lollipop Lily Valentine

Whirly Gig Valentine

Pillow Box Alligator

Valentine’s Day Cards

Pop-up Valentine Card

Valentine Party Favor Containers

Recycled Valentine “Drum” Containers

Sour Cream Look-a-like Containers

Fancy Folded Envelope

Valentine Crafts

Painted Valentine Soap

Valentine Treats

Pencil Pop Heart Lollipops

Heart Sugar Cookies

Miniature Heart Cheesecakes

Valentine’s Day Gifts

Zippered Pouch and Travel Tissue Cover

Valentine’s Day Activity

Heart Attack

Valentine’s Day Party Inspiration

Kid’s Cookie Decorating Party

Missy’s Queen of Hearts Party

The post Valentine’s Day Ideas, Crafts, Decorations and Activities appeared first on Skip To My Lou.

How to: Valentine crafts for kids

$
0
0

Looking for some fun Valentine’s Day crafts? Here is a round up of some kid-friendly and inexpensive ideas!

Bookmarks are great gifts and these felt hearts from Holiday Crafts and Creations are adorable!
Need a little Valentine decor to brighten winter days?  How About Orange has a great tutorial for a pretty fabric heart garland.
Little ones love weaving with colored paper.  Mrs. Picasso’s Art Room shows them how to make their very own super-cute valentines!
This is the sweetest button wreath!  Perfect Valentines Co UK makes it easy!
Do you love felting?  If so, this little ring bowl is going to make you swoon!  Feltorama’s guest blogger, Marigold, from the blog Hideous! Dreadful! Stinky!  provides simple step-by-step instructions.

The post How to: Valentine crafts for kids appeared first on Skip To My Lou.

Cute sayings for Valentine’s Day

$
0
0

These cute sayings paired with candy, a small toy or little gift would make cute Valentines! Don’t miss these printable valentines that will help you have darling valentines as easy as one two three!  And if you love to celebrate Valentine’s Day with crafts these fun Valentine’s Day Crafts will keep you busy!


“You’re the bomb” – a bath bomb

“I like hanging out with you” or “I ‘a-door’ you” – Personalize a door knob hanger.

“I’m bananas for you” – Provide healthy valentines with bananas or banana bread

“You are one of a kind” – Attach playing cards.

“You pull at my heart!” – How about a shrinky dink zipper pull?

“I think you are purrr-fect!” – Anything with a cat (bookmark, sticker, trinket) would be cute with this saying

“I’m stuck on you!” or “Let’s stick together!” – A great saying for hair clips, magnets or stickers!

“No bones about it you are top dog” – Dog bone shaped sugar cookies would make a cute treat!

“It is ‘ruff’ when you are not around” – Anything with a dog (bookmark, sticker, trinket) would be cute with this saying!

“You wrote the book on being cool!” – package with a purchased or homemade bookmark

“I dig you!” – Package treats with a small plastic shovel.

“I am ‘TOADally’ yours” – Plastic jumping frogs would be cute taped to a card with this saying or make some frog suckers.

“You are a keeper” or“I’m hooked on you” – Pair this with a package of Swedish Fish!

“You rev me up” or I ‘wheelie’ like you! – This saying with a small car would make for a fun valentine!

“I am hog wild for you” -Anything with a pig (bookmark, sticker, trinket) would be cute with this saying!

“You ‘moo-ve’ me!” – Anything with a cow (bookmark, sticker, trinket) would be cute with this saying!

“I would ‘quack’ up without you” – A small rubber ducky would be fun with this saying attached to it’s neck!

“I’m your number one fan” or “I am your biggest fan, or “you blow me away!” – A paper fan or A battery operated personal fan

“You blow me away” – Blow Pop sucker

“You are the apple of my eye”  – Apples

“You really measure up” or “You rule!”  – Ruler or measuring tape

“I’d SNAP at the chance to be your Valentine” – plastic toy alligator, bang snaps or how about an alligator pillow box

“You are the highlight of my life”  – highlighter pen

“I like you ‘beary’ much!” – Teddy Grahams or gummy bears

“You are o’fish’ally awesome” or “You’re a great catch  – Goldfish crackers

“You are a winner” – A purchased lottery ticket or a homemade scratch-off lottery ticket.

“I am stuck on you” –  Glue or Stickers

“I am stuck on you” or “I ‘chew’s you Valentine” Gum

“You are EXTRA special to me”  – Extra Gum

“You are out of this world!”   – Orbit Gum

“I have my eye on you” fun glasses or magnifying glass

“I am buggy for you!” – some plastic bugs or a lady bug Valentine.

“You are a cut above the rest!” Scissors or cookie cutter

“You melt my heart” Hot Chocolate and marshmallows

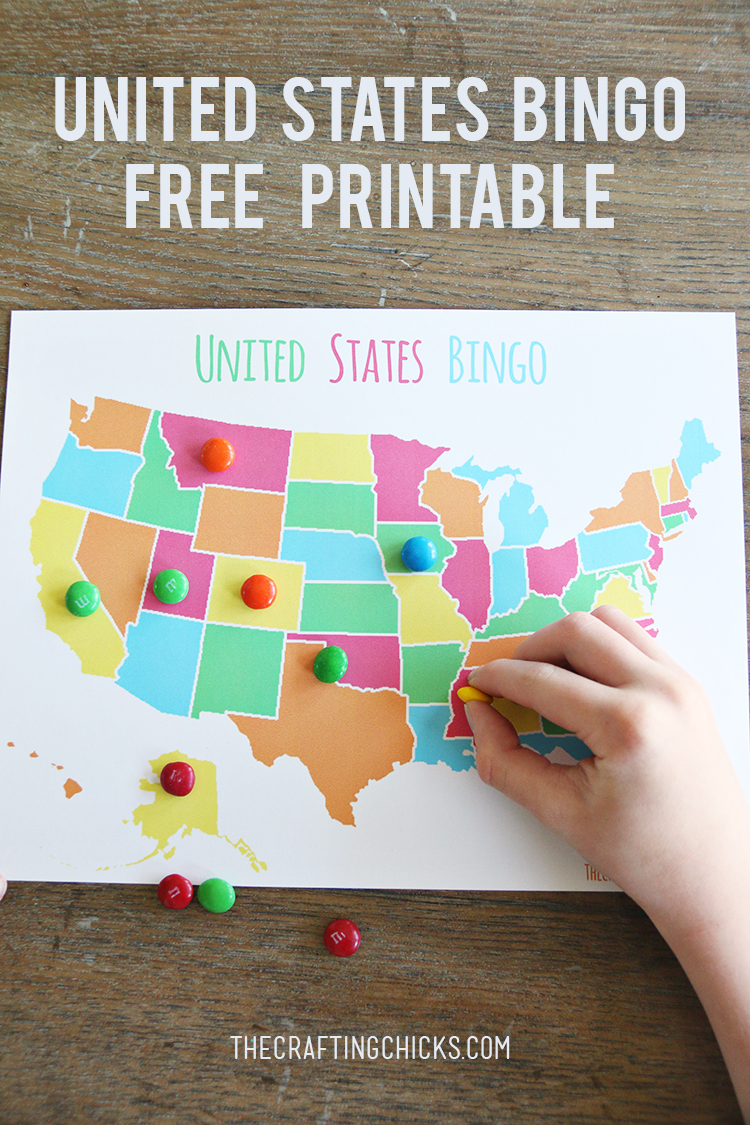
“You mean the world to me” Map

“I think you’re aMAZINGing” book of mazes

“You are the icing on the cake” Cake or cupcakes

“You rate sky high with me” – an airplane or a handmade whirly gig

“You take the cake”  – Cake or cupcakes

“You make my heart bounce”  – super balls 

“I ‘wheelie’ like you!”  – a toy car

“I am fortunate to have you”  – Fortune Cookies (you can even make homemade fortune cookies)

“I like the way you roll”  – toy car, Tootsie Rolls or Rolos

“I have a CRUSH on you”  – Orange Crush Pop

“You are ‘SUMbody’ special!” – An inexpensive calculator from the $$ store would be a useful gift!

“You are just ‘write’ for me!” – A pencil or pen is always an appreciated gift!

“My heart ‘beats’ for you!” – a play drum or drum recycled candy containers

‘Donut’ you know I love you! – Donuts

“Our love was ‘mint’ to be” – Mints

“You rock!” or “Have a blast” or “You are a blast” – Who doesn’t love pop rocks candy!

“You are as cute as a button!” – button bookmark, button bracelet or button shaped cookies or candy would be cute clipped to a card with this saying

“You are a hottie” – Hot Tamale candy

“LIB it up this Valentine’s Day” or ” I am MAD about you Valentine” – A book of Mad Libs

“I’d always pick you” – a bouquet of flowers

“I  treasure  your friendship” – Hershey’s Treasures Candy


The post Cute sayings for Valentine’s Day appeared first on Skip To My Lou.

Free Printable Valentine Paper Chain by Pear tree Greetings

$
0
0

Pear tree Greetings here. We are here to share with your our Free Printable Valentine chain!  Great for decorating, crafting with kids, and giving away to friends– these chains are so cute! Simply download here with this link Free Printable Valentine Banner.


We also offer a variety of Valentine’s (like below)!  Shop now to get 15% Off  Valentine’s Day Cards using the promo code LOVE15. Offer good on all Valentine’s Day products. No minimum order required. Cannot be combined with other discounts or promo codes, or applied to previous orders. Expires 1/31/2013.

Don’t miss all the other fun printable Valentines in our Print Your Valentines Series


The post Free Printable Valentine Paper Chain by Pear tree Greetings appeared first on Skip To My Lou.

I Melt for You DIY

$
0
0

i-melt-for-you DIY

Hi, it’s Amy here, from amyistheparty.com. I love all things party related – baked goods, decorations, and even themed gifts. I remember one year my mom made me this awesome ice cream soda with gum drops (much like the one pictured above). I proudly displayed it on a shelf in my room, until the gum drops got stale and my mom made me throw it away. It’s an adorable and inexpensive Valentine that is guaranteed to impress!

Supplies:

  • gum drops
  • toothpicks
  • styrofoam ball
  • ice cream float glass
  • straws

I started by wrapping my styrofoam ball in a little bit of plastic wrap, so as too keep the gumdrops edible. I filled the bottom of my ice cream float glass with gumdrops. If you don’t have an extra float glass on hand, you can find them pretty easily. I got mine at a local thrift store.

Place the styrofoam ball into the top of the glass. Now cover the top of the ball with gumdrops! I cut my toothpicks in half with scissors, then inserted the halves into the gumdrops. Now stick the other end of each toothpick into the styrofoam.

i-melt-for-you DIY

I cut my straws to different lengths and stuck them into the styrofoam, between some gum drops. I used striped paper straws but bendy straws would be cute too.

Now download the ice cream tags I designed for you. Print them on cardstock and cut out your favorites.

i-melt-for-you DIY

Use a regular hole punch to make holes in the tops of the tags. Tie one onto your float glass using a bit of ribbon or baker’s twine.

i-melt-for-you DIY

Make one for your teacher, your friends, your sweetheart, your child…and don’t forget…yourself!

Don’t miss all the other fun printable Valentines in our Print Your Valentines Series


The post I Melt for You DIY appeared first on Skip To My Lou.

How to create a custom stamp

$
0
0

Would you believe you can create your own custom stamp from supplies found at Lowe’s? This is a great kids activity.  We used these simple supplies to create some Valentine’s Day Cards.
homemade custom stamps

Grab some scraps of wood. We used 3 inch squares of MDF. You will also need some kitchen and bath sealant or caulk.

DIY custom stamp supplies

Use a pencil to make an outline of your design to use as a guide.

DIY block print tutorial

Place sealant along the pencil drawing. If there are raised areas where you started and stopped, a finger dipped in water can gently pat them down.

DIY Block Print how to

Allow sealant to completely dry. Read package for complete details. Once dry paint a little paint on the dried sealant and stamp onto paper.

home made stamps

Or you can use an ink pad for stamping your design.

homemade rubber stamps

How easy was that! So next time your are at Lowe’s you can pick up your crafting supplies! We do!

DIY Block Print

Lowe’s is the perfect place to find supplies to craft outside the box! For great ideas and loads of inspiration sign up for their FREE Creative Ideas Magazine.  You can also follow  Lowe’s on Facebook for more ideas.

LOWES-Creative-Magcollage1[1]

Thanks Lowe’s with providing with a gift card to purchase my supplies!


The post How to create a custom stamp appeared first on Skip To My Lou.

Easy Drink Recipes

$
0
0

In search of some easy drink recipes?  These recipes are all very simple to put together and make everything feel extra special. They are perfect for any party and I love to host a backyard party!  After all a little fruit in your drink or maybe even a umbrella is sure to make any summer evening one of the best.  Don’t miss my best ever margarita recipe, it is simple to make and always requested.

Easy Drink Recipes

Pineapple Rum Punch Sangria

It’s perfect for entertaining this time of year, not to mention that it’s super easy to make and tastes like tropical paradise in a glass!

pineapple-rum-punch-recipe-sangria-cocktail2

Moscato Pink Punch Recipe

This is so easy to make, it is becoming one of my favorite quick and easy summer recipes.

moscato pink punch

Easy BS Skinny Cocktail

All the right flavors without all the calories.

Skinny Cocktail

Blueberry Lemonade


This light and refreshing Blueberry Lemonade is totally homemade, yet incredibly easy to make. Perfect to make ahead and chill, you will love this sweet beverage!

blueberry-lemonade-1

Frozen Watermelon Margaritas

With only five ingredients, these Frozen Watermelon Margaritas are so easy to make! Whether you have a birthday party or pool party, this is the tastiest drink recipe and something unique to try this summer.

Watermelon-Margaritas-Party-Recipe


The post Easy Drink Recipes appeared first on Skip To My Lou.


Made By You Monday

$
0
0

It’s  Monday show us what you’ve got. It is time to link up your crafty goodness! Please don’t forget to link back! — a text link at the bottom of your post, or link somewhere on your blog is okay!

made by you monday


Don’t miss a thing! Sign up to get crafty ideas, recipes, sewing tutorials and more delivered right to your inbox. Follow Skip to My Lou on FB and Google+ to find out the latest news! Join me at Pinterest and Instagram for an extra dose of fun!

The post Made By You Monday appeared first on Skip To My Lou.

50 Boredom Busters: Crafts & Activities for Hours of Summer Fun

$
0
0

Summer break is here! You will want to have these summer craft ideas in your arsenal for every time you hear “Mom I’m Bored”!  Here are 50 kid tested and Mom approved boredom busters sure to create hours of summer fun! Be sure to bookmark this post because I will keep adding more fun summer crafts!
50 summer crafts and activities

Boredom Busters and Summer Crafts

  1. Go back in time and make can phones
  2. Get sewing with these beautiful printable sewing cards
  3. Have some ooey gooey fun with homemade slime
  4. Learn about science and let your kids think you are amazing by making some oobleck
  5. Make a summer journal covered with your child’s artwork
  6. Explore underwater with a DIY aqua scope
  7. Catch butterflies with a homemade butterfly net
  8. Have fun with a bubble blower
  9. Hold a backyard regatta with these clever juice box boats
  10. Make your own dazzling Kaleidoscope
  11. Paint it up with amazing homemade puffy paint
  12. Set your back yard a glow with beautiful tin can lanterns
  13. Strike up the band with your own homemade musical instruments
  14. Make friendship bracelets for all your friends
  15. Add a new pet to your family with this cute pet rock tutorial
  16. Tell your fortune with this printable fortune teller
  17. Make your beach towel super easy to carry to the pool by making it into a clever beach towel tote bag
  18. Make an entertaining yo yo balloon
  19. Make your own DIY Chia Pet
  20. Bring on the rain with a homemade rain stick
  21. Create a beautiful bracelet on your next nature walk
  22. Play with you food with this edible food paint
  23. Practice crochet and create a beautiful crochet mosaic
  24. Make smores on a stick
  25. Make your own scratch off paper –so cool!
  26. Make chalk paint to decorate side walks and patios
  27. Get creative and make your own Stepping Stones
  28. Personalize your own Yo Yo
  29. Keep in touch with friends with these homemade postcards
  30. Watch Brave and make a DIY bow and arrow
  31. Make your own beary cute softie with this printable
  32. Go on a adventure and keep your boys happy all summer with this duct tape bull whip
  33. Marbleize Paper with this recipe
  34. Plant some fun and create a flower pot person
  35. Go outside and play catch with this DIY bleach bottle catch game!
  36. Make your own fabric scrap dolls
  37. Decorate your flip flops with this duct tape flower
  38. Stamp out boredom and make your own homemade rubber stamps
  39. Have a water fight with these summer sponge bombs
  40. Sew a simple bookmark for your favorite book
  41. Get involved with nature with DIY Bird house
  42. Cool off with the best ice cream sandwich recipe
  43. Make bread in a bag
  44. Make ice cream in a bag
  45. Keep kids reading by read the book “Arnie The Doughnut” and then make felt donuts
  46. Make rock candy
  47. Guaranteed hours of fun make homemade playdough
  48. Create your very own creature!
  49. Do more than color make your own crayons in cool shapes for all sorts of fun
  50. Make your own Lemonade Stand

Don’t let the fun end here! How about these fun summer crafts and kids activities.

Pom Pom Flip Flops Tic Tac Toe Toss Game 3-D Chalk Paint

If you find it too hot or rainy to be outside these indoor crafts would entertain and engage little hands for hours!

Paper Towel Butterflies Painted Pasta Necklace DIY Child's Artwork Candle


The post 50 Boredom Busters: Crafts & Activities for Hours of Summer Fun appeared first on Skip To My Lou.

Dad Coloring Page

$
0
0

Do you have the best Dad EVER? Let him know with this Best Dad Coloring Page Award.

Coloring page for Dad

Best Dad Coloring Page

This Father’s Day coloring page makes a great card for Dad. Download the free page, grab some crayons, markers or pencils and your child can create a special award for Dad.

{Best Dad Ever Coloring Page}

Dad Coloring Page

If you want to tell exactly why he is the best Dad you might like this Father’s Day Coloring Page. This coloring page gives plenty of room to tell the best things about your Dad. It is always fun to see how kids answer these question.

Father’s Day Coloring Sheet

Father's Day Coloring Page


The post Dad Coloring Page appeared first on Skip To My Lou.

Easy way to add fun color to your hair using Kool Aid

$
0
0

This super fun Kool Aid Hair Dye is one of the many  Kids Crafts and Activities we are sharing this summer here on Skip to my Lou . There is no reason to be bored! Just check out this boredom buster idea list for inspiration.  Vanessa is here to share a fun idea to color kids hair, they are sure to love it.

Hey everyone, I’m Vanessa from Our Thrifty Ideas, a blog where I talk about all things creative. I am super excited to be here and talking about a fun Summer vacation activity that you can do with your kids. It’s already been a hit at our house and will be throughout the whole Summer break.

add temporary hair color to your hair using kool-aid

This Summer we are trying to do some fun things that are unexpected, fun and things we can’t do during the school year. My son’s very first thing he wanted to do was buy flip flops and never take them off his feet (which he hasn’t, a week into Summer break!) and my daughter’s one request was to have color in her hair. She has clip in color strips that she got for Halloween last year, and asks for them to be clipped in daily after school. She’s definitely my girly girl with all the personality a little 4 year old can have. So I decided that we would let her have her crazy colored hair this Summer, since we don’t have any school policy’s holding us back. But our biggest dilemma was that she couldn’t decide on what color she wanted to have. First it was red, then blue, then pink, purple was thrown in there once too. The only one I told her we would’t do was green because I didn’t want her to look like a little blonde who spent too much time in the pool. We spent too many efforts last year preventing her hair from turning green from our daily swims!

I came up with the perfect solution to her color problem, we would do temporary Kool Aid hair dye colors all Summer long and she can pick whatever color she wants next once the color has faded.

add temporary hair color to your hair using kool-aid

Now because I figured we would be doing a bunch of different colors all Summer long, I didn’t want to be buying any pricey temporary colors, so we decided to do the Kool-Aid method. Did you do this when you were a kid? Who didn’t right?!

This was really simple and because of my daughter’s blonde hair didn’t take us long at all. Just something to remember, the darker the hair color, the longer it’s going to take for the color to take hold.

Supplies for Kool Aid Hair Dye

  • Old T-shirt
  • 2-3 packages Kool-Aid
  • 2 cups water
  • cup or bowl
  • comb
  • blow dryer
  • hot straightening iron

My daughter actually wanted purple hair this time around, so we used 2 Purplesaurus Rex packages and 1 cherry to give it a deeper color. It was a very purple liquid but came out more of a deep pink color in her hair. Next time we may try grape instead and see where that gets us!! This chart seems to give some good color combo ideas, but unfortunately didn’t have a purple option.

Kool Aid Hair Dye Instructions

This process is best done on freshly washed hair that has been completely dried. To finish the prep, make sure to comb out your hair and if there’s any that you don’t want colors, pull them up in an elastic or clip. We only did the underneath of my daughter’s hair, so I pulled the top layers up into a top knot to keep them from reaching the color.

Also put your child in an old t-shirt that you don’t care about getting colored. The hair will drip and could possibly dye the shirt they are wearing. Also, I would recommend gloves if you don’t want your fingers to also be the color of the hair!

add temporary hair color to your hair using kool-aid

Combine your Kool-Aid packets and water in a pot and heat on medium-high heat until boiling. Boil for 1 minute then remove from the heat. Pour your mixture into a heat resistant cup or bowl. Depending on how much hair your want colored will determine how much liquid you want. I started with all of it in a bowl, but quickly took some out because I didn’t want to risk coloring the whole hair strand as we only wanted a few inches colored. Also keep in mind that the color will creep up the hair strands, so dip it about 1/2 inch less than you want colored.

add temporary hair color to your hair using kool-aid

I did her hair in 3 sections. Dip them in the color and let them soak for about 15 minutes. Darker hair may need 20-25. This is a perfect time to put a movie on and let them sit and watch while you hold their hair in the color. Because of how light my daughter’s hair is, we only kept the hair in for about 5 minutes and it still got a very vibrant color! Once the strand is done, ring it out with an old towel to avoid drips and move on to the next section until all is complete.

add temporary hair color to your hair using kool-aid

Once everything is colored where you want, it’s time to dry it. Blow it dry using a comb to brush out any tangles. Just know that for the first little bit the hair will be a little stiff or sticky feeling.

Kool Aid Hair Dye

After you blow it dry, the best thing to do is to use a hot straightening iron to set the color. Just a quick run over the hair will do fine. As soon as I was done, I took a damp cloth and wiped down the heating pads to remove any residue that may have transferred.

add temporary hair color to your hair using kool-aid

Now style the hair as you normally would, and you are all done!!!

This Kool Aid hair dye is not a permanent dye, but depending on the hair, could last a few days or maybe a few weeks. It’s a fun things to do with your little ones who want a little personality in their do!

add temporary hair color to your hair using kool-aid

What colors would your child want in their hair?

add temporary hair color to your hair using kool-aid

I would love to know what fun and out of the norm activities you have planned with your little ones this Summer. Leave them in the comments below! Also look below for a few other fun Summer ideas I have on my blog Our Thrifty Ideas and follow my social media channels to be up to date on the fun things we are doing all Summer long.

Instagram | Facebook | Pinterest

Pineapple-Blueberry-Homemade-Popsicle-Recipe

3 ingredient HEALTHY Blueberry Pineapple Popsicles

Grilled Pizza Pocket Sandwiches

Campfire Pizza Pockets

back-to-school-countdown-chain

Print & Cut Back To School Countdown Chain


The post Easy way to add fun color to your hair using Kool Aid appeared first on Skip To My Lou.

Story Stones

$
0
0

These Story Stones are unique way to spark creativity during the summer or to take on a road trip.   This is just one of the many Kids Crafts and Activities we are sharing this summer here on Skip to my Lou . Just check out this boredom buster idea list for even more inspiration.  Welcome Toni…

Hello, it’s Toni from Design Dazzle here today. Thank you to Skip To My Lou for letting me be a part of their fun summer series! I enjoy sharing lots of fun kids ideas, DIY, parties, crafts and more. Please come over for a visit! One of my recent summer posts, I shared a beach tablescape theme

Beach Tablescape by Toni from Design Dazzle

So on to needing something easy and fun to do with your kiddos?? How about something to keep the kids busy on long car rides? How about keeping them busy when they shout out the famous one, “I’m bored!!” What about fun prompts for campfire tales? Here we have a super cute project the kids will absolutely enjoy creating and playing with.

Story Stones - Design Dazzle

The purpose of these story stones is to create an easy prompt for make-believe tales. Kids can pick from random which stone to start off on, or simply pick their favorite. They can even combine story stones for cooky, crazy story.

Story Stones - Design Dazzle

Such a cute duck!

Story Stones - Design Dazzle

How about a cupcake, car and a whale adding tons of interest to a story?


Here are the materials needed:

  • Assorted Acrylic Craft Paints (colors of your choice)
  • Medium-sized stones (stones that are large enough to paint pictures on, but not too large that it’s a hassle to carry them around).
  • Paint Brushes
  • Bag or basket for storage
Story Stones - Design Dazzle-1-2

You can purchase stones at a home improvement store. Or better yet hopefully you can find some in your yard or close to home.

Story Stones - Design Dazzle-2-2

Gather some paints, paint pens, etc. Let your kids go to town. Kids can paint their stones wherever their imagination takes them, whether they pick their favorite animal, food, toy, place… anything that they think will create a great story!

Story Stones - Design Dazzle

And let’s not forget about a cheeseburger adding some “cheesiness” to a story ; )

Once the paint is dried, and a couple of story stones have been made, these story stones can be taken on all kind of adventures–even adventures around the home.

I love that these stones are very easy to take traveling – perfect for a long family car ride. What I love even more is that these story stones get those creative juices flowing–when the kids are painting and when they brew up their stories.

Another way to use these story stones is to create writing prompts. Have your child choose a stone out of a bag and then incorporate that story stone picture into a written sentence.

Enjoy your new adventures your kids take you on!

Here are two summer fun activity posts I’ve shared on Design Dazzle that are SUPER fun:

How to make giant bubbles | Design Dazzle

How To Make GIANT Bubbles!

Free printables - 3 ring binder dollhouse | Design Dazzle

Free Printables for 3-Ring Binder Dollhouse

Thank you for having me over today!!

I would love a follow on Design Dazzle’s Social Media!!

Facebook  ||  Pinterest  ||  Twitter  ||  Instagram


Save

Save

Save

The post Story Stones appeared first on Skip To My Lou.

Smores in a Jar

$
0
0

These Smores in a jar are a perfect way to serve your summer favorite!  Kids love this snack.   Don’t miss the many Kids Crafts and Activities we are sharing this summer here on Skip to my Lou . There is no reason to be bored! Just check out this boredom buster idea list for inspiration. Vanessa shared this fun idea to color kids hair, they are sure to love it.

Smores in a jar

Hi everyone! I’m Stephanie from SomewhatSimple.com and I am excited to be here on Skip to My Lou today!

One of the things I love most about the summertime is the cool summer recipes we make around my home. We live in Arizona, so the cooler the food, the better! These S’mores in a jar are a great twist on a classic summer dessert. They are super delicious and waaaay less sticky! Here is how to make them:

S’Mores in a Jar

INGREDIENTS: 

  • graham crackers, crushed
  • chocolate brownies
  • vanilla ice cream
  • marshmallows, toasted (you can toast them over your stove)

VARIATION:

  • You could use chocolate pudding instead of the brownies and ice cream – my kids LOVE this version!

DIRECTIONS: 

  1. Grab a couple jars or cups and layer your s’mores in the following order:
    . graham cracker crumbs
    . chocolate brownie
    . vanilla ice cream
    . toasted marshmallows
  2. Serve with a spoon and enjoy!
Smores in a Jar

HAVE FUN THIS SUMMER!!

round logo 400

We have plenty of fun activities you can do with your kids on SomewhatSimple.com. Take a look at a few of our favorites:

activities for kids

Mary Poppins Family Movie Night ||  Family Time Capsule Free Printables || Butterfly Life Cycle Activity

Be sure to follow us on Social Media –

Facebook || Pinterest || Twitter || Instagram || YouTube

Have a great summer!!!

The post Smores in a Jar appeared first on Skip To My Lou.

Weekly Meal Planner #32

$
0
0

This weekly meal planner is full of great recipes. Take a minute to plan your meals ahead you won’t believe the difference it will make in your week.  If you like free printables don’t miss my free weekly planner it is also a great way to help you plan your week.

Weekly Meal Planner #32

Weekly Meal Plan #32 from some of your favorite bloggers

Your hostesses for this week are:Hostesses Image

With Special Guest Hosts Jodie & Jen…

Jodie and Jen from eighteen25

…from Eighteen25!

Let’s take a look at this week’s menu—

Sunday
Chopped Chicken Avocado Salad at the Idea Room

Delicious, fresh salad. Yum!

Chopped Chicken Avocado Salad from the Idea Room


Menu Monday

Lemon Herb Chicken Marinade from Your Homebased Mom

Fire up the barbecue and get this one going!
Lemon Herb Marinade from Your Homebased Mom


Menu Tuesday

Slow Cooker Meatballs from Somewhat Simple

You only need 3 things to make this one! Our kind of meal.

3 Ingredient Slow Cooker Meatballs from Somewhat Simple

Menu Wednesday

One Pot Fettucine Alfredo from Skip to My Lou

One pot meals are always a favorite.
One Pot Fettuccine Alfredo from Skip to My Lou

Menu Thursday

Santa Fe Chicken Salad from Thirty Handmade Days

New take on a salad – add jicama! This one is so good.

Delicious Santa Fe Chicken Salad with Marzetti Simply Ranch Dressing from www.thirtyhandmadedays.com

Menu Friday

Pasta E Fagioli Soup from the Idea Room

Yum. You can’t go wrong with this soup recipe.

Pasta E Fagioli Soup from the Idea Room


Menu Saturday

Breakfast for Dinner Casserole from the 36th Ave
Because sometimes you just need a break from the norm. Am I right?
Breakfast for Dinner Casserole from the 36th Ave
Menu Dessert
No Bake Lemon Cheesecake from Eighteen25
No bake and lemony? Delish!
No Bake Lemon Cheesecake via Eighteen25


Which one are you most excited to make?
Weekly Meal Plan #32 from some of your favorite bloggers
Enjoy!

The post Weekly Meal Planner #32 appeared first on Skip To My Lou.


Made By You Monday

$
0
0

It’s  Monday show us what you’ve got. It is time to link up your crafty goodness! Please don’t forget to link back! — a text link at the bottom of your post, or link somewhere on your blog is okay!

made by you monday


Don’t miss a thing! Sign up to get crafty ideas, recipes, sewing tutorials and more delivered right to your inbox. Follow Skip to My Lou on FB and Google+ to find out the latest news! Join me at Pinterest and Instagram for an extra dose of fun!

The post Made By You Monday appeared first on Skip To My Lou.

Baby Lock Common Threads

$
0
0

Recently I spent three amazing days at Baby Lock headquarters in St. Louis, Mo. The event, Common Threads, brings together some of the most creative people in the sewing community to share their projects, ideas, and their love of sewing.  What a warm, inviting community this is. I am always awed by their willingness to share information, ideas and help each other be better!

common threads

Baby Lock – For the love of sewing

We spend loads of time chatting and getting to know each other but we also spend time sewing! I love the time to share with these amazing women, to learn about new trends and have the opportunity to sharpen my skills and learn more about BabyLock sewing machines. What a thrill to sew on Baby Lock’s Destiny sewing machine!

Babylock Destiny

Each year BabyLock also provides an opportunity to use our skills for good.  This year my sweet friend Lindsay Wilkes of The Cottage Mama showed us how to make the most adorable appliquéd pillow case dresses for little girls in Africa.  We all worked together to create over 50 dresses to benefit children in Africa. Please take a minute to learn more about Little Dresses for Africa you too might want to whip up a pillowcase dress!

Baby lock sewing machine

Amy Barickman and I are showing off all the darling dresses!

Win a Swag Bag and Sizzix Machines

I wouldn’t tell you about all this goodness, if I couldn’t share something special with you. When we arrive at Common Threads we receive an amazing swag bag! Starting June 24th, you can enter to win of of the amazing “Swag Bags” filled with some pretty fabulous goodies. The special swag includes books, newly released patterns, special notions and even Sizzix machines. You will also want to see more from Common Threads. Just go here.


The post Baby Lock Common Threads appeared first on Skip To My Lou.

4th of July Decoration

$
0
0

This 4th Of July Decoration is fun to make with kids and perfect to decorate for the holiday bonus it doubles as a game!  Kids will love helping you make these and playing with them.   This is just one of the many Kids Crafts and Activities we are sharing this summer here on Skip to my Lou . Just check out this boredom buster idea list for even more inspiration.  Welcome Natalie…

Hi there it’s Natalie from Fern & Maple here today. A big thank you to Skip To My Lou for inviting me to be a part of their fun summer series! This is my first time joining and I’ve had a lot of family fun pulling together this post for you.  I enjoy sharing fun party ideas, DIY, crafts and more so pop on over for a visit!

Well, let’s talk 4th of July! It’s coming up quickly and you may already be in the midst of trying to get things ready for family celebrations.  So why not let the kids help you this year? If they are anything like my 2, there will be one who loves to help and another who needs to be tricked into it! I have a few cute and easy projects the kids can help you with to decorate the table AND they can even make their own activities to keep them busy on the day.

resized table setting full

Best of all you can make all of these with tin cans and either scraps/supplies around the home or things you can pick up from your local craft or dollar store.  First, the must have supplies:

  1. Tin cans (various sizes depending upon the craft)
  2. Twine or string
  3. Scissors
  4. Glue
  5. Drill OR screwdriver & hammer to punch holes in the cans
  6. Any red, white, blue & gold crafting materials you can find around the house (or stop by your local craft store or dollar store); for example: stickers, ribbon, duct tape, paint, googly eyes, faux flowers, lace or leather scraps
  7. Crafting tools; for example: paint brushes, markers, sharpies, chalk pens etc.
Tin Cans resized supplies 3 resized supplies 2

The Table:

First let’s have the kids help decorate the table – they can use the cans to make everything from potted plants to cutlery holders.

TIN CAN PARTY DECOR

Follow these easy steps:

  • Step 1: Ensure the tin cans are empty, clean and the outer paper layer and top lid are removed.
  • Step 2: Let their imaginations go wild decorating the cans with the supplies above.
resized creating resized stickers resized stickers 2

Once the decor is dry and the glue set  you have a collection of decorated cans .  These are just some of the ideas the kids and I came up with for our table, don’t let this limit your family’s imagination.  There are so many uses for a decorated tin.  Here are the additional supplies you need for each:

  • Potted plants or flower vases – just add soil & a plant or water & flowers
resized ready to pot resized potting materials resized potting
  • Pencil or cutlery holders – just add pencils or cutlery!

Tip: For cutlery, line with greaseproof paper or a napkin

resized pencil holder
  • Place setting centerpieces – this is the basic decorated can but with a name label added; the kids made one for me and one for my husband and filled them with treats!
resized gluing reszied creating resized kid decor

Tip: Use chalkboard labels for adding names

resized writing

The Games:

Next the kids can create the games they can play on the day – follow steps 1-2 above and then here are the following steps to create each of the retro games my husband & I remember from our youth.

TIN CAN PARTY GAMES

Tin Can Phones

Our family has an old cord phone attached to the wall at home. It doesn’t work anymore but it entertains the kids endlessly.  They don’t understand why or how you would use it – especially since it doesn’t play Minecraft! So my husband & I thought we would take a step further back in time and show the kids how we used to communicate with our friends at summer.  I still remember tin can talks with my neighbour next door and they were awesome for tree house to ground communications! We showed the kids how easy it was to make tin can phones work, their faces were priceless!

resized with dad

Tip: Keep that string tight/taut & don’t let it touch anything!

  • Step 3: Take 2 tin cans and punch small holes in the center of each of the tops of the cans.  To do this you can either use a drill or a sharp screwdriver and a hammer.
resized drilling materials resized drilling hole resized drilled hole
  • Step 4: Measure out the length of string, your choice but between 30-90 feet is great, we just measured out between the front and back yards.
  • Step 4: Thread string through both holes, one end in one can, the other end in the other can. Push it through the outside/top of the can and tie the ends of on the inside if the can.  Tip: Tape over the ends of the string to narrow the string to make it easier to thread through the holes.
resized stringed can resized threading resized knot resized double strung cans
  • Step 5: Step apart from each other until the line is taut and then one person speaks into their can while the other puts their ear to the other and listens
resized listening 3
  • Step 6: Sit back & watch the reaction

Tin Can Stilts (for racing!):

  • Step 3: Take 2 larger size cans and punch small holes on opposite sides of the can near the top (place at the end where the lid of the can still remains NOT the end where the lid was removed).  To do this you can either use a drill or a sharp screwdriver and a hammer.
resized sticker on ribbon 2 resized stilt walking resized double strung stilt
  • Step 4: Measure out the 2 lengths of string, one for each can. Length will depend on who is standing on the cans. I got the kids to stand on top and measured the height from the kids feet up to their waist (so they could bend their arms and pull tight on the string to help them walk).  Then I doubled the length and added the can width so it allowed for the string to come up each side, creating a loop they can hold.
resized stilt walking 3 resized close up stilt walking resized foot 1
  • Step 4: Thread the string through both holes and tie off at the top.  Tape over the ends of the string to narrow the string to make it easier to thread through the holes.
  • Step 5: Help the kids onto the cans, then holding one string in each hand they need to lift the can at the same time as moving their foot.  It may take a couple of tries before they get used to doing it themselves, but before you know it they will be racing!

Tip: Use larger size cans for this activity to fit little feet!

resized foot 2

Swinging Ball Toss:

  • Step 3: Take a tin can and punch a small hole in the center of the top of the can.  To do this you can either use a drill or a sharp screwdriver and a hammer.
  • Step 4: Measure out the length of string, your choice but between 1-2 feet,  the longer it is the more challenging it becomes.
  • Step 5: At the end of the string attach a ball that will fit fairly comfortably into the can.  I used lightweight practice golf balls that have holes in them so are easy to tie onto the string.  If you only have a ping pong or rubber ball you can put a hole in it and screw in an eyelet screw that the string can easily pass through to tie off.
  • Step 6: Get your children to try and swing the ball up in the air and catch it in the tin can.  Most catches in a row wins!  This leads to competition every time!
resized ball toss resized ball toss tie resized yay

Carnival Tin Can Toss

  • Step 3: Take 3-6 (or more if you dare) decorated tins and stack them off center to create a pyramid
resized toss start resized duct can resized threading 2 resized getting ready for mom resized close up toss

Step 4: Give the kids a tennis ball and a marker to stand behind and get them to try and knock the cans down, just like they do at carnivals….only it’s possible!  Put the pyramid on a cake stand to add to the challenge (all the cans must be knocked off the stand to win).

resized playing 1

SAFETY TIPS

  • Holes should be done by adults or with adult supervision
  • Try and use cans without ragged edges if the kids are going to use them.  You can also line the top edge with duct tape to protect little hands

Here  are some other fun DIY’s if you are having a party this summer; a photo booth and prop bar perfect for a luau or tropical get together and yarn craft flower fun the kids can do too.

Thank you for having me over today!!

I would love a follow on Fern & Maple’s Social Media!!  I’m a blogger, party & brand stylist, crafter, event planner & “handler” of a Canadian husband, USA /Aussie born kids & a choc lab Elsa. My blog is the life of a New Zealander living abroad and bringing the party with her!

Facebook  ||  Pinterest  ||  Twitter  ||  Instagram


The post 4th of July Decoration appeared first on Skip To My Lou.

DIY Wind Chimes

$
0
0

Making wind chimes is a easy and fun activity for the summer!  Your kids will love listening to them blowing all summer long.    This is just one of the many Kids Crafts and Activities we are sharing this summer here on Skip to my Lou . Just check out this boredom buster idea list for even more inspiration.  Welcome Marissa from Rae Gun Ramblings

My 2 year old is wind chime obsessed. Most nights after dinner we’ve taken to going on walks and he gets SO excited when he sees a wind chime so I thought it would be fun to make one together.

Easy kids craft idea. DIY wind chime full instructions great for toddlers to tweens.

Marissa from Rae Gun Ramblings where I blog about all things crafty, delicious, and bookish. I’m super excited to share an easy wind chime tutorial with you today!

Love this idea! DIy wind chimes that the kids can help make. Great kids activity idea.

For the little guys they will LOVE helping to decorate the “chimes” but will need a little help assembling the whole thing but if you have tweens they could probably do this project all on their own. It’s a great project since it’s something you can draw out to fill an afternoon or finish in less than an hour if you want.

Supplies needed to make a wind chime. With full DIY tutorial great kids activity.

What You Need

  • Metal Washer (I used 12 washes -3 strings of 2 and 2 strings of 3)
  • Fishing Wire
  • Acrylic Paint
  • Paint Brushes
  • Inside part of small plastic embroidery hoop (affiliate link)

How fun DIY wind chimes perfect activity to do with the kids.

What to Do

I used 12 washes (3 strings of 2 and 2 strings of 3)

  1. Decorate your metal washers. These will become your “chimes”. I just let my little guy paint however he wanted surprisingly he really wanted to paint the hole part haha but I got him to get some on the actual washers. Let them dry and flip them over to decorate the other side. Acrylic paint drives fast so once we were done with one side on all of them we were able to flip them over.
  2. Cut your fishing line into 40 inch long pieces (I did 5 strings of “chimes” so I cut 5).
  3. Fold one string in half and string the first washer on by threading the two tail ends through the folded end.
  4. Decide where you want the next washer to go and tie a knot with both strings (remember it’s folded). For me this was about 4 inches above the first washer. Next separate the strings and thread another washer on. It should be stopped but the knot you just tied.
  5. Now with both strings together again tie a double knot to keep the washer in place.
  6. Repeat for all your washers and strings. I did 3 strings of washers with 2 washers each and 2 strings with 3 each. If I had had more washers I would have done 3 strings with three but it worked out fine how I did it.
  7. Once all your strings are prepped tie it onto your embroidery hoop. Make sure to just use the inner piece that is a full circle. Tie a couple times and feel free to loop your thread around to make it secure. Keep the long tails that you should have left (you will use this to form the hanging piece).
  8. Now that all your strings are tied onto your hoop separate them so they are equally spaced. Gather them together and tie a double knot. Then 2 inches above that tie another double knot that.
  9. You can now hang your wind chime from a hook using the space in between those two double knots.

Fun and easy kids activity. DIY wind chime with step by step tutorial instructions

My little boy is crazy obsessed with this! He’s proudly told everyone about the wind chime he made and he loves making it chime every time we go outside. We experimented with hanging it from a tree and from a shepherds hook we’re still trying to decide which we like best 🙂

How to make your own wind chimes. Fun kids craft with full tutorial instructions.

I have plans to make another one with him but instead of paint I’m going to look for some stickers and then we’ll cover the whole washer with outdoor mod podge I’m really excited, now just to find some awesome stickers.

Great source for easy recipes, fun crafts, sewing tutorials, and book recommendations.

I had a blast hanging out I hope you stop by my blog Rae Gun Ramblings for tons of book fun, quick and easy recipes, and tons of creative ideas! Want more kids activities here are some of my favorites from my blog.

50 fantastic Harry Potter crafts, recipes, party ideas and more!

Every July I do a huge Harry Potter series and these are the awesome Harry Potter crafts, recipes, and other projects from last year!

Teach kids to sew with this super easy skirt tutorial

Teach your little one to sew with this super easy and fast banded skirt tutorial.

Add these to your reading list. Must read young adult fairytale retellings. Great book list.

For your older kids here are some awesome Fairytale retellings! These are all YA so good for more mature tweens to teens at heart!

Let’s connect! You can also find me hanging out here.

PhotobucketPhotobucketPhotobucketPhotobucketPhotobucketPhotobucketPhotobucket

The post DIY Wind Chimes appeared first on Skip To My Lou.

US Map Game

$
0
0

This US map game is a great way to help your kids learn about the United States while they play a game they love….BINGO!   Simply print out this free bingo game and start the fun.  This is just one of the many Kids Crafts and Activities we are sharing this summer here on Skip to my Lou . Just check out this boredom buster idea list for even more inspiration.  Welcome The Crafting Chicks…

US Map Game

US Map Game

I’m Jamie from The Crafting Chicks. We LOVE Cindy, and are so inspired by Skip to My Lou! I’m excited to be here today sharing an adorable game idea to help your little ones learn about the United States of America.

I love the lazy mornings, and easy going days of summertime. But, it’s not too fun when the boredom steps in! We’ve been following along with our Mother Hen Summer to bust that boredom. One week is all about Maps, and kids will have fun exploring maps and their world.

This United States Free Bingo Game is a perfect way to teach about the USA. It will give your kids a fun geography quiz. I have a 6 year old who is obsessed with learning about the States, and this Bingo game has been a hit!
free bingo game

How to play US Map Game

This free bingo game is supper simple to play. We use M&M’s for markers, or you can use cheerios! You choose.

Give clues about the states. Players will try and find out which State you are thinking of. We also talk about cities and capitols. This is a great way for kids to learn their capitols!

The first to get 10 correct states wins! Or you can play until black out! We Love using the site 50 States to get ideas for our USA bingo. You can find information about each state. The Bingo caller can use these when calling out clues!
sm us bingo 3Such a fun way to learn about the USA map and states!free bingo gamesm united states bingo

Free Bingo Game

Download Here. PERSONAL USE ONLY PLEASE. All printables belong to The Crafting Chicks, LLP.Download Black

For more SUMMER FUN, follow along with our Mother Hen Summer Series. We are bursting that summer boredom one week at a time! With 12 weeks of fun themed activities, lessons, games, printables, recipes and more! All at your fingertips.

mother hen details 2016 mother hen intro 2016

The post US Map Game appeared first on Skip To My Lou.

Viewing all 1107 articles
Browse latest View live


Latest Images